🎨 AI Image Upscaler
Project Category: Individual Project
I built a dual-AI image upscaling pipeline from scratch optimized for AMD GPUs. My implementation integrates Real-ESRGAN's GAN architecture via Vulkan and EDSR's CNN model through OpenCV DNN, providing both GPU-accelerated (2-5 sec) and CPU fallback (15-30 sec) processing paths. The tool handles batch processing with automatic model selection and classical enhancement fallback.
🔧 Technical Implementation
Dual-AI Pipeline Architecture
I engineered a Python-based upscaling system with two independent AI paths:
1. Real-ESRGAN Vulkan Integration
Built executable wrapper calling realesrgan-ncnn-vulkan.exe with dynamic model loading (realesr-animevideov3-x{scale}.param or realesrgan-x4plus.param). Achieves 2-5 second processing via AMD GPU Vulkan acceleration.
2. EDSR OpenCV DNN Pipeline
Implemented opencv_edsr.py using cv2.dnn_superres.DnnSuperResImpl_create() to load TensorFlow models (EDSR_x2.pb, EDSR_x3.pb, EDSR_x4.pb). CPU-based processing with 15-30 second execution time.
3. Classical Enhancement Fallback
Designed fallback pipeline using Lanczos interpolation (cv2.INTER_LANCZOS4), CLAHE adaptive contrast (cv2.createCLAHE(clipLimit=3.0)), and unsharp masking with Gaussian blur for AI-independent upscaling.
4. Batch Interface
Created image_upscaler.bat Windows batch interface with method selection (1=Real-ESRGAN, 2=EDSR), scale selection (2x/3x/4x), automatic model path resolution, and output file naming (filename_method_x{scale}.ext).
💻 Code Architecture
opencv_edsr.py - EDSR AI Pipeline
# My EDSR implementation workflow:
def enhance_image_ai(image_path, scale, output_path):
    image = cv2.imread(image_path)  # Load RGB image
    model_path = f"models/EDSR_x{scale}.pb"  # Dynamic model selection

    # Create DNN super-resolution object
    sr = cv2.dnn_superres.DnnSuperResImpl_create()
    sr.readModel(model_path)  # Load pre-trained TensorFlow model
    sr.setModel("edsr", scale)  # Configure EDSR with scale factor

    upscaled = sr.upsample(image)  # Execute CNN upscaling (15-30s)
    cv2.imwrite(output_path, upscaled)  # Save enhanced image

# Classical fallback if AI fails:
def enhance_image_classical(image, scale):
    # Step 1: Lanczos4 interpolation upscaling
    resized = cv2.resize(image, (w*scale, h*scale),
                         interpolation=cv2.INTER_LANCZOS4)

    # Step 2: CLAHE adaptive contrast in LAB color space
    lab = cv2.cvtColor(resized, cv2.COLOR_BGR2LAB)
    clahe = cv2.createCLAHE(clipLimit=3.0, tileGridSize=(8,8))
    lab[:,:,0] = clahe.apply(lab[:,:,0])
    enhanced = cv2.cvtColor(lab, cv2.COLOR_LAB2BGR)

    # Step 3: Unsharp masking for sharpness
    blurred = cv2.GaussianBlur(enhanced, (5,5), 1.0)
    sharpened = cv2.addWeighted(enhanced, 1.5, blurred, -0.5, 0)
    return sharpened
resize_images.py - Utility Script
Built image preprocessing tool for sample generation:
def resize_image_to_square(input_path, output_path, size=256):
    img = cv2.imread(str(input_path))
    height, width = img.shape[:2]

    # Calculate scaling to fit within square
    scale = size / max(width, height)
    new_width, new_height = int(width * scale), int(height * scale)

    # Resize with Lanczos interpolation
    resized = cv2.resize(img, (new_width, new_height),
                        interpolation=cv2.INTER_LANCZOS4)

    # Add white padding to create exact square
    top_pad = (size - new_height) // 2
    bottom_pad = size - new_height - top_pad
    left_pad = (size - new_width) // 2
    right_pad = size - new_width - left_pad

    square_img = cv2.copyMakeBorder(
        resized, top_pad, bottom_pad, left_pad, right_pad,
        borderType=cv2.BORDER_CONSTANT, value=[255,255,255]
    )
    cv2.imwrite(str(output_path), square_img)
📊 Visual Comparisons
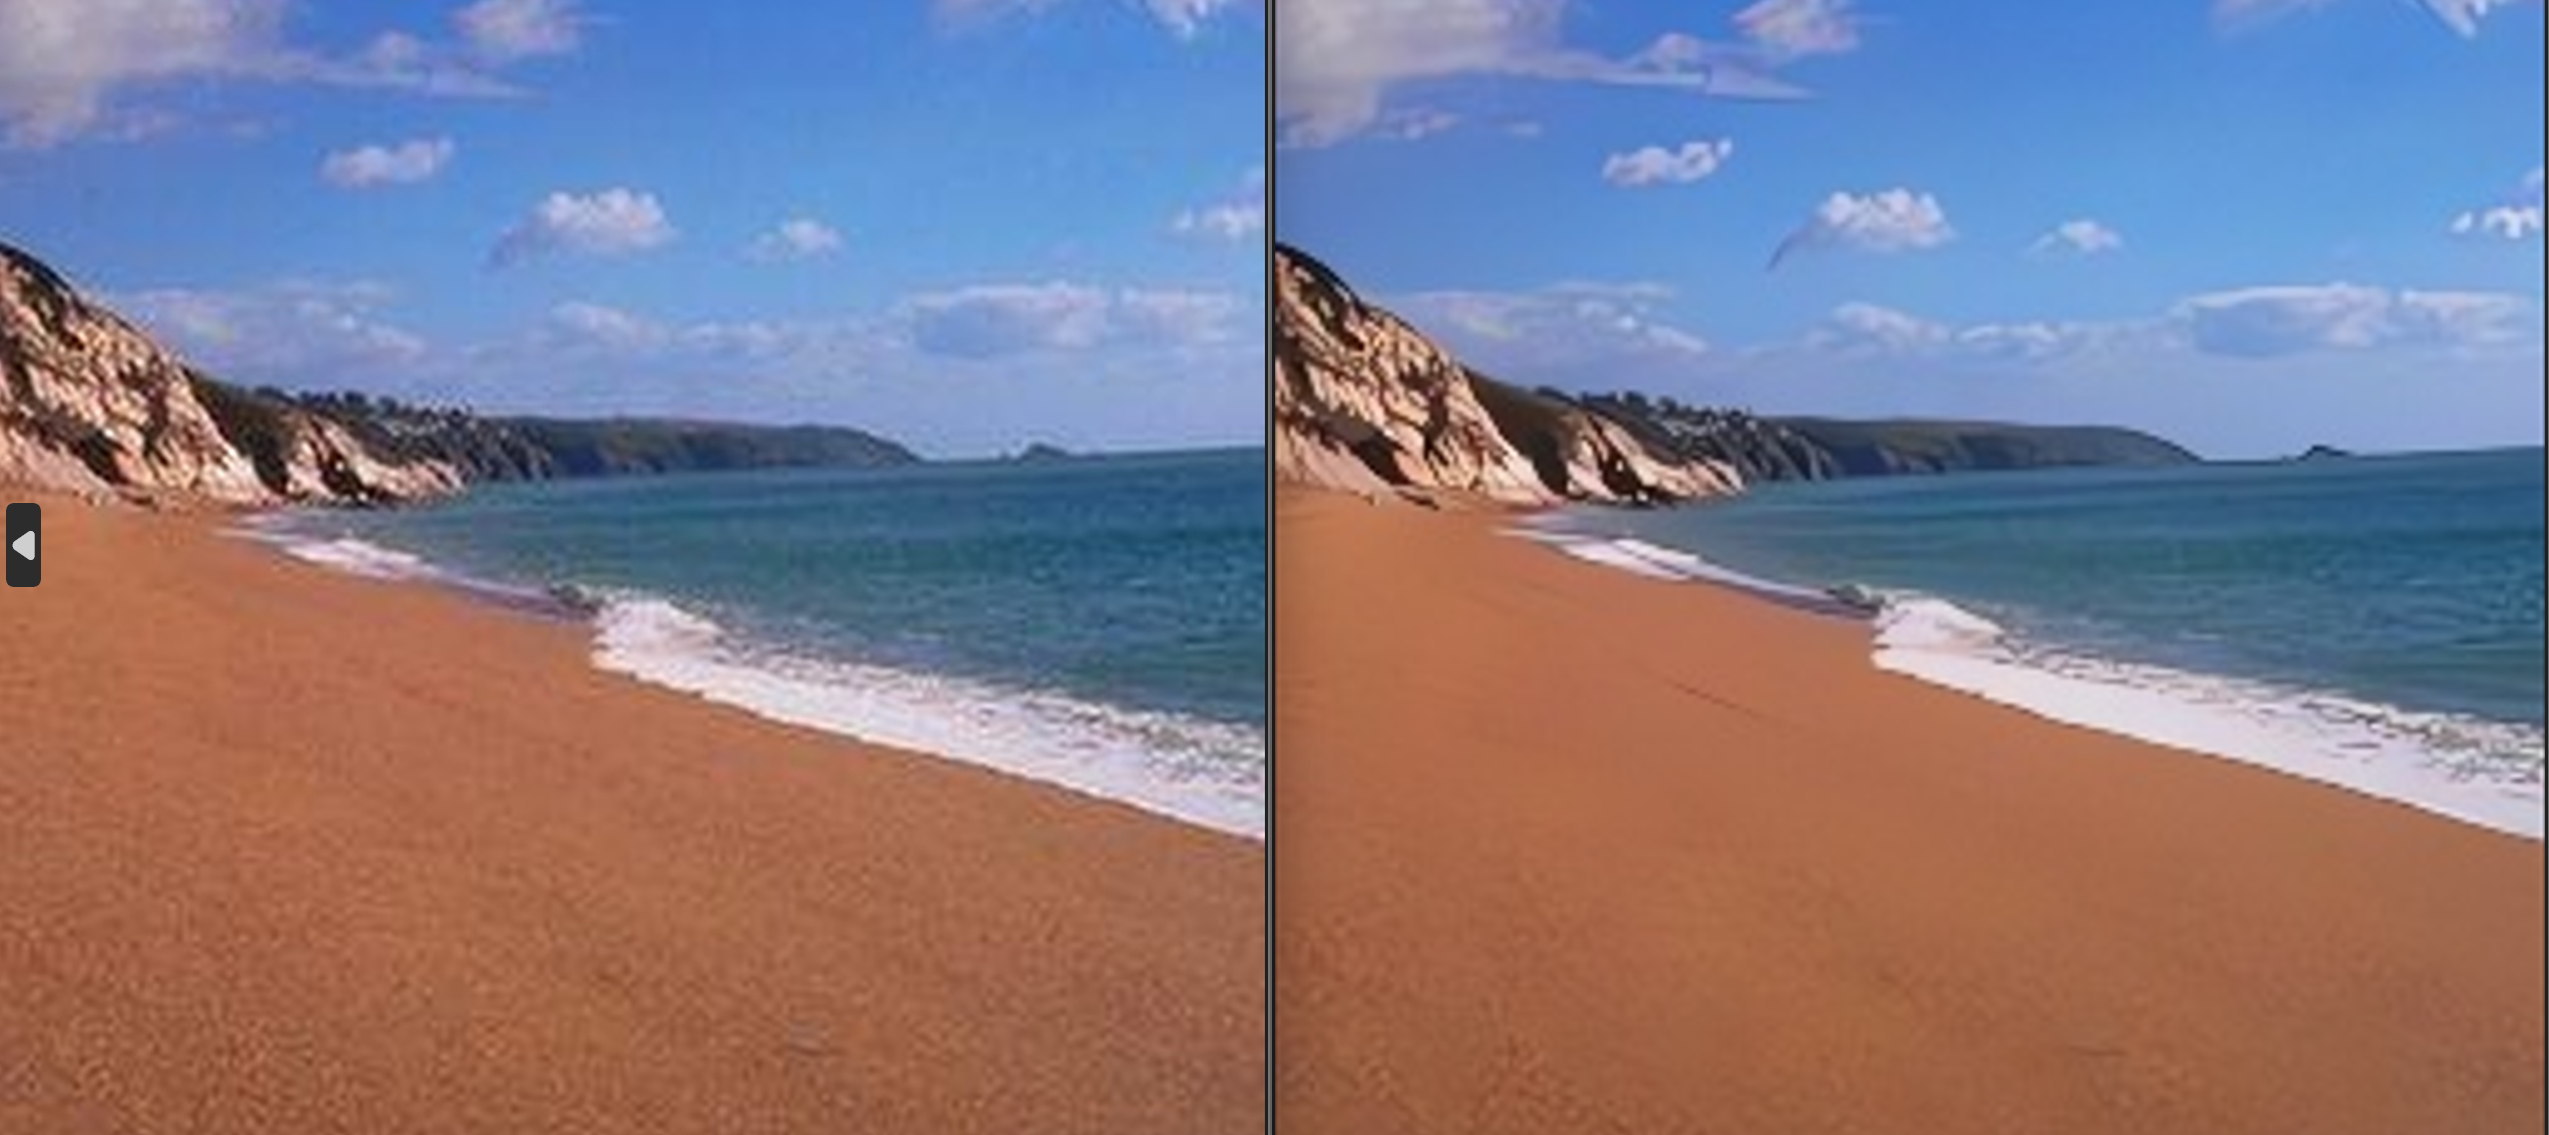
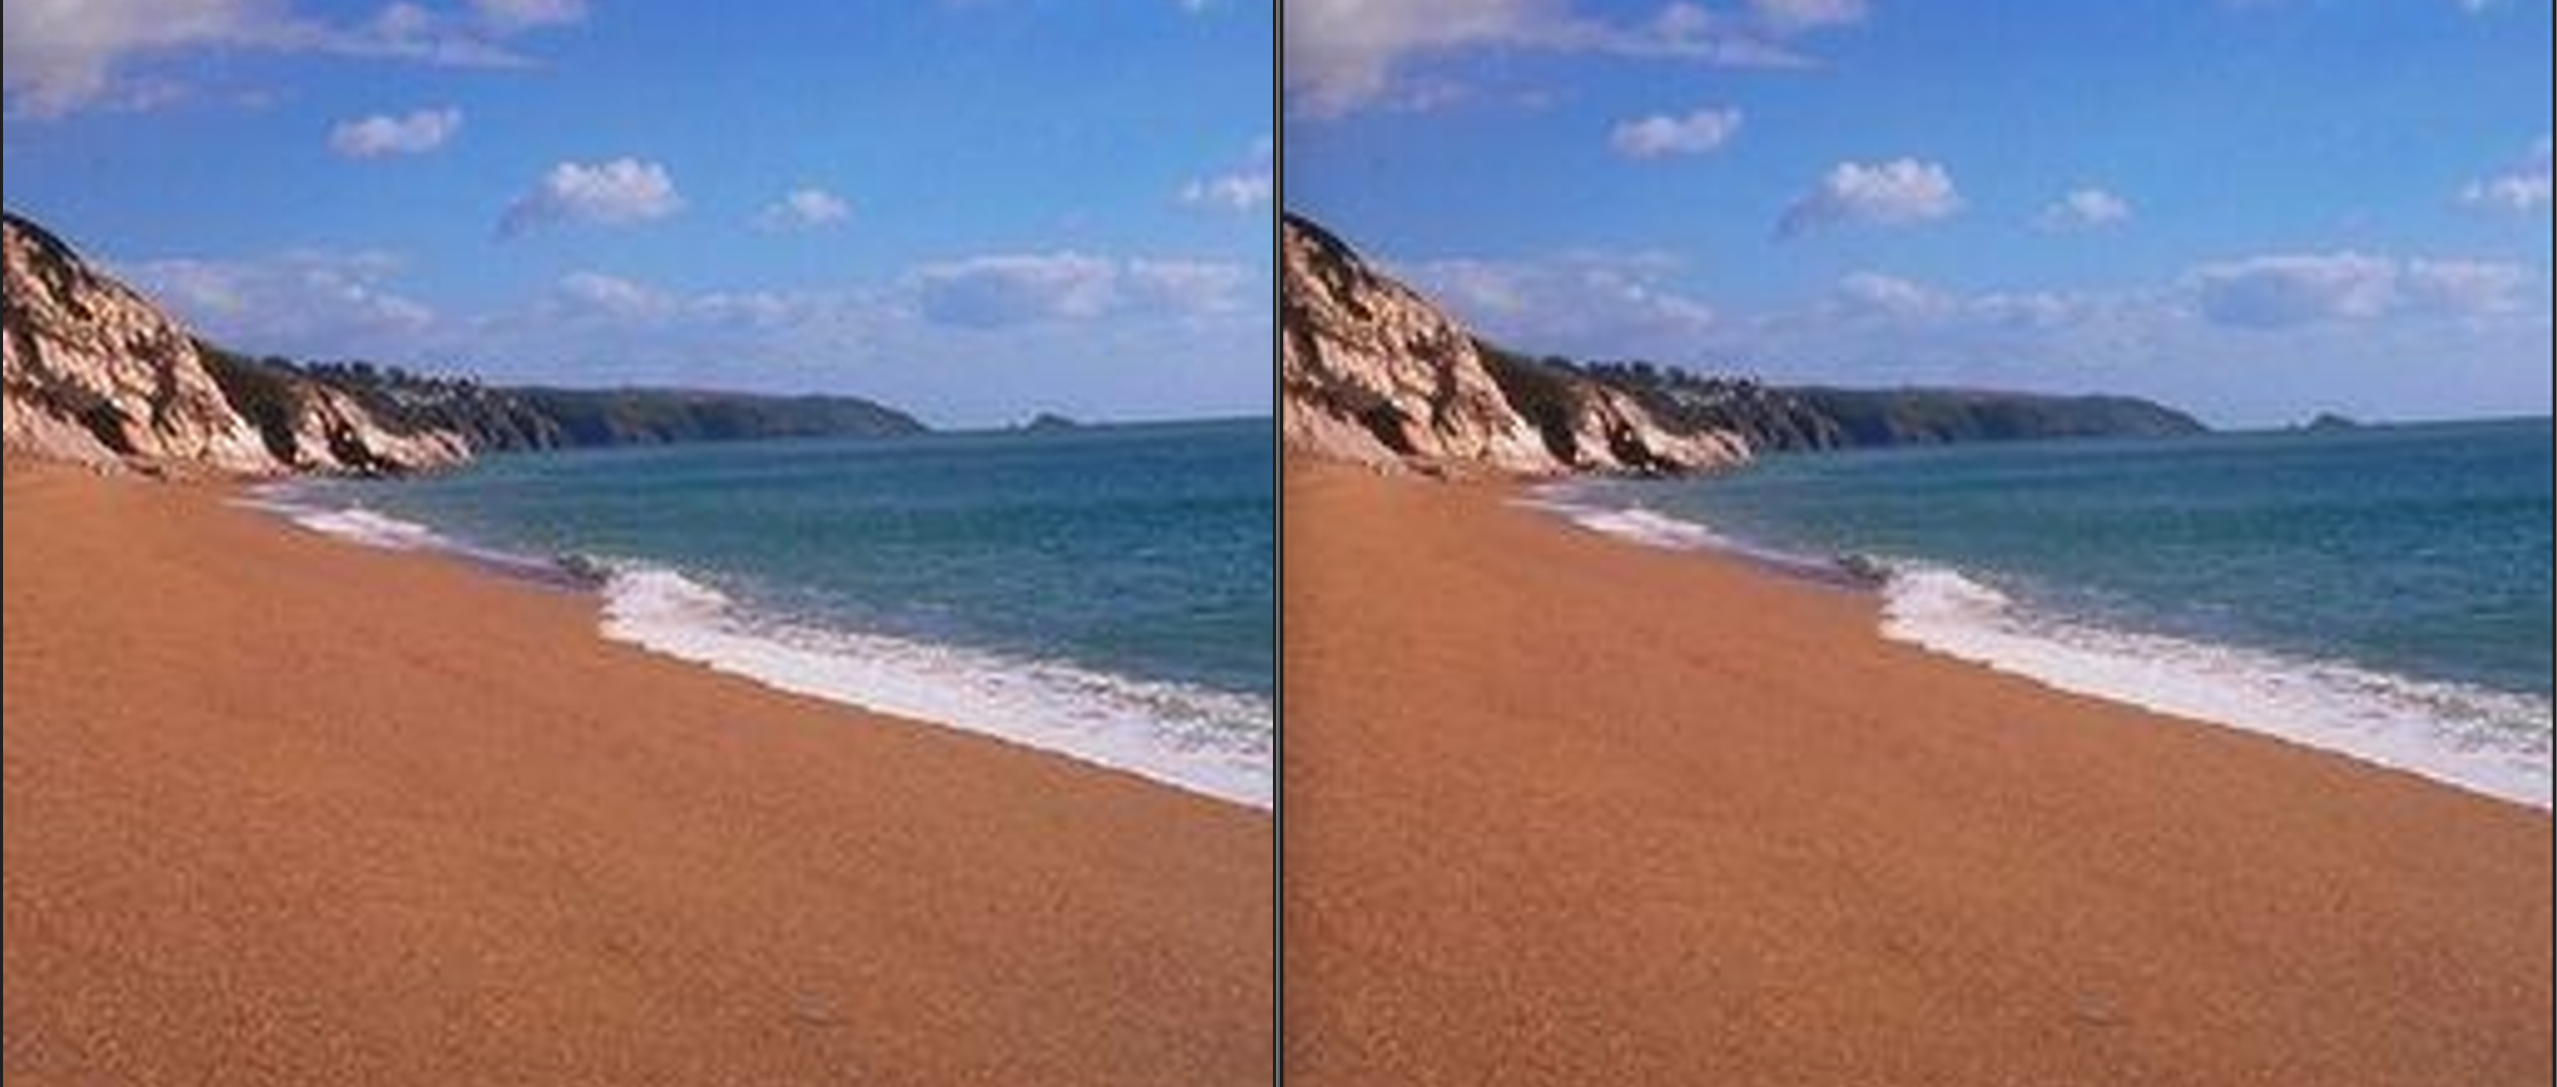
Each image is split 50/50: Left = Original, Right = AI Upscaled (4x)
Real-ESRGAN Sample 1
GAN-based dramatic enhancement

EDSR Sample 1
CNN-based precise sharpening

Real-ESRGAN Sample 2
Texture recovery and detail generation
EDSR Sample 2
Edge sharpening and artifact reduction
🎯 Method Selection Strategy
Real-ESRGAN (GAN Architecture)
- Processing: 2-5 seconds per image (Vulkan GPU)
- Best for: Severely degraded images, blurry photos
- Strengths: Dramatic detail recovery, natural textures, complex scene handling
- Limitations: Can over-enhance near-complete images
- My Implementation: Subprocess execution of
realesrgan-ncnn-vulkan.exewith automatic model selection based on scale factor
EDSR (CNN Architecture)
- Processing: 15-30 seconds per image (CPU)
- Best for: Already decent images, precise refinement
- Strengths: Sharp edges, careful detail preservation, minimal artifacts
- Limitations: Slower, less dramatic improvements
- My Implementation: OpenCV DNN module with pre-trained TensorFlow
.pbmodels, automatic fallback to classical enhancement if model loading fails
🚀 Usage
# Batch interface workflow:
image_upscaler.bat "path\to\image.png"

# Interactive prompts:
Choose method:
1. Real-ESRGAN Vulkan (GPU - 2-5s, dramatic quality boost)
2. EDSR OpenCV (CPU - 15-30s, precise sharpening)
Enter 1 or 2: 1

Choose scale (2, 3, or 4): 4

# Output:
✅ Success! Output: output\image_realesrgan_x4.jpg
📦 Requirements
- Python 3.13+ with pip package manager
- OpenCV:
pip install opencv-python opencv-contrib-python - AMD GPU: RX 6000/7000 series for Vulkan acceleration (Real-ESRGAN)
- Models: EDSR TensorFlow models (
EDSR_x2.pb,EDSR_x3.pb,EDSR_x4.pb) and Real-ESRGAN ncnn models (realesr-animevideov3-x{scale}.param) - Windows: Batch interface optimized for Windows 10/11